介绍
本文使用idea创建工程
根据springboot官网操作:
https://spring.io/guides/gs/spring-boot/
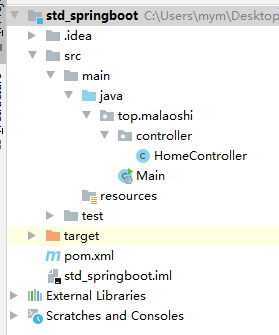
最终工程结构
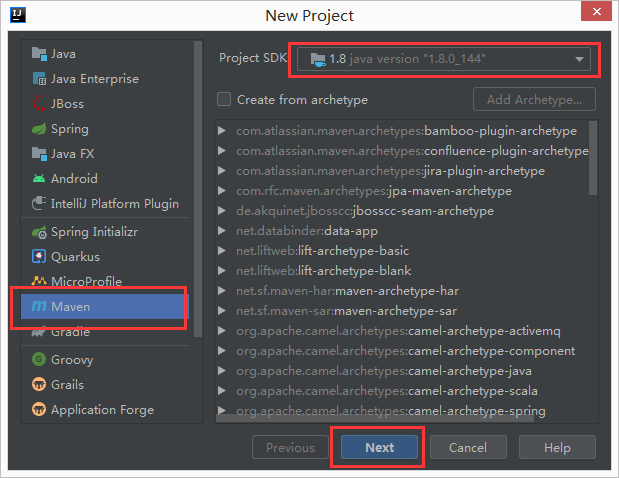
创建工程
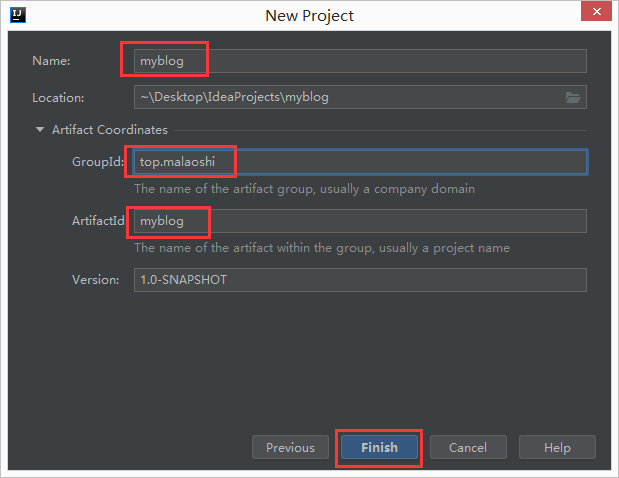
修改idea配置
https://www.malaoshi.top/show_1EF5g1TmRp3A.html
修改pom.xml文件
配置properties (最好加上)
<properties>
    <maven.compiler.source>1.8</maven.compiler.source>
    <maven.compiler.target>1.8</maven.compiler.target>
    <project.build.sourceEncoding>UTF-8</project.build.sourceEncoding>
    <project.reporting.outputEncoding>UTF-8</project.reporting.outputEncoding>
    <java.version>1.8</java.version>
</properties>
不写 <project.build.sourceEncoding>UTF-8</project.build.sourceEncoding> 编译时可能警告:
[WARNING] File encoding has not been set, using platform encoding GBK, i.e. build is platform dependent!
不加版本,可能不支持JDK8语法
idea2020版,不加版本,可能不支持JDK8语法,如编写下面泛型代码:
List<String> list=new ArrayList<>();
运行时可能报下面错误:
Error:(30,68) java: -source 1.5 中不支持 diamond 运算符
添加依赖(必须)
有两种方式,这里介绍一种:
<dependencyManagement>
    <dependencies>
        <dependency>
            <groupId>org.springframework.boot</groupId>
            <artifactId>spring-boot-dependencies</artifactId>
            <version>2.2.2.RELEASE</version>
            <type>pom</type>
            <scope>import</scope>
        </dependency>
    </dependencies>
</dependencyManagement>

<dependencies>
    <dependency>
        <groupId>org.springframework.boot</groupId>
        <artifactId>spring-boot-starter-web</artifactId>
    </dependency>
</dependencies>
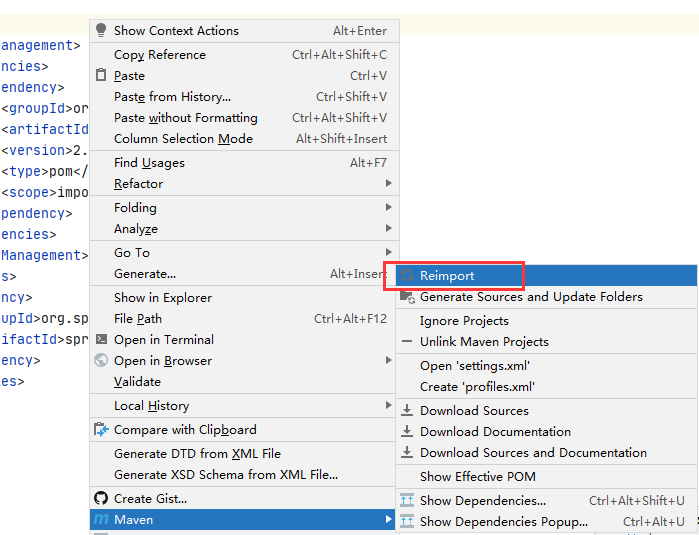
idea2020版本需要点击导入依赖(必须):
完整pom.xml
<?xml version="1.0" encoding="UTF-8"?>
<project xmlns="http://maven.apache.org/POM/4.0.0"
         xmlns:xsi="http://www.w3.org/2001/XMLSchema-instance"
         xsi:schemaLocation="http://maven.apache.org/POM/4.0.0 http://maven.apache.org/xsd/maven-4.0.0.xsd">
    <modelVersion>4.0.0</modelVersion>

    <groupId>top.malaoshi</groupId>
    <artifactId>myblog</artifactId>
    <version>1.0-SNAPSHOT</version>


    <properties>
        <maven.compiler.source>1.8</maven.compiler.source>
        <maven.compiler.target>1.8</maven.compiler.target>
        <project.build.sourceEncoding>UTF-8</project.build.sourceEncoding>
    </properties>

    <dependencyManagement>
        <dependencies>
            <dependency>
                <groupId>org.springframework.boot</groupId>
                <artifactId>spring-boot-dependencies</artifactId>
                <version>2.2.2.RELEASE</version>
                <type>pom</type>
                <scope>import</scope>
            </dependency>
        </dependencies>
    </dependencyManagement>

    <dependencies>
        <dependency>
            <groupId>org.springframework.boot</groupId>
            <artifactId>spring-boot-starter-web</artifactId>
        </dependency>
    </dependencies>
</project>
详细参见下面链接:
https://www.malaoshi.top/show_1EF5qXhI66uM.html
创建首页
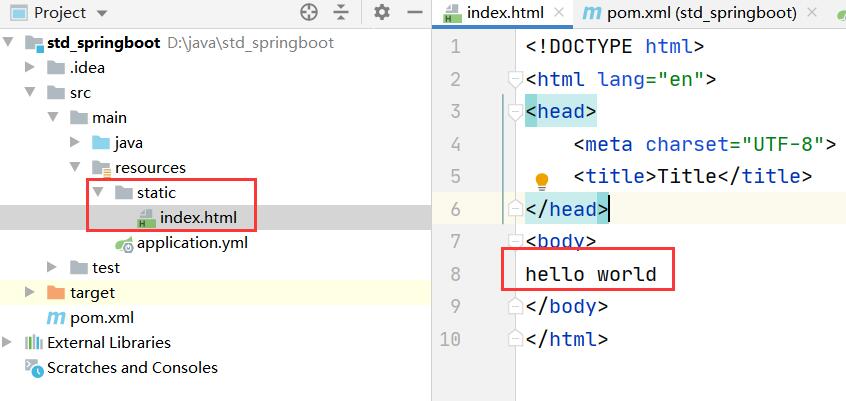
按照下图目录创建 index.html
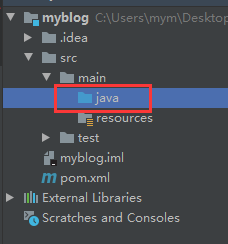
创建启动类
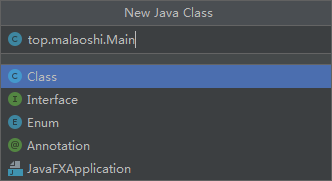
类内容如下:
import org.springframework.boot.SpringApplication;
import org.springframework.boot.autoconfigure.SpringBootApplication;

@SpringBootApplication
public class Main {
    public static void main(String[] args) {
        SpringApplication.run(Main.class,args);
    }
}
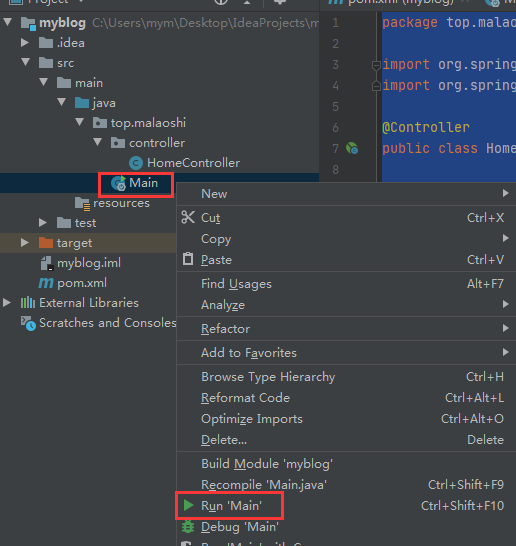
启动
测试
打开浏览器访问 http://localhost:8080/ 可以看到页面显示hello world